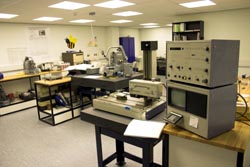
In January, 2015, our Calibration Laboratory received accreditation to International Laboratory Management Standard ISO 17025:2005 from The United Kingdom Accreditation Service (UKAS).
In December 2019 we were accredited against the new ISO 17025:2017 standard by UKAS.
This makes us one of only two UK calibration laboratories that are UKAS accredited for measurements of surface texture parameters, and the uncertainties of 2% + 4 nm which we offer for measurements of Ra and Rq within the range 0 to 25 µm, are currently the lowest uncertainty values available from any UK calibration laboratory.
In May 2021 we were accredited to measure step heights (depths) between 100nm and 1mm, at minimum uncertainties between 20nm and 500nm.
We can provide UKAS Calibration Certificates for any roughness specimen or measurement standard, step height or groove specimen, whether manufactured by us or by any other manufacturer. (UKAS No. 4685)
Full details of the parameters and their corresponding Best Measurement Capabilities are shown in the table below:
| Measured Quantity | Range | Calibration and Measurement Capability (CMC) Expressed as an Expanded Uncertainty (k = 2) | Remarks | |
| LENGTH | ||||
| Surface texture measurement standards | ISO5436-1:2001 Types B, C and D(Ra, Rz, Rt, Rq, Rmax, Rp, Rv) | NOTES:
|
||
| Peak to valley range | Ra, Rq | Rz, Rt, Rmax, Rp, Rv | ||
| 10 nm to 100 nm | 2.0 % + 4 nm | 3.0 % + 4 nm | ||
| 100 nm to 1.0 µm | 2.0 % + 4 nm | 3.0 % + 10 nm | ||
| 1.0 µm to 25.0 µm | 2.0 % + 4 nm | 3.0 % + 20 nm | ||
| Notes:The specific characteristics of the standard being calibrated may significantly affect the estimate of the measurement uncertainty. | Example A calibration certificate might report on a measurement standard whose nominal values are Ra = 1 µm, Rz = 3.0 µm, thus:
Ra = 1.01 µm +/- 0.0242 µm Rz = 3.20 µm +/- 0.116 µm |
|||
| DEPTH | ||||
| Step Height (depth) measurement | Depth Range | Best Measurement Expanded Uncertainty (k=2) Capability | ||
| 100 nm to 2.5µm | 20nm | |||
| 2.5µm to 100µm | 80nm | |||
| 100µm to 1mm | 500nm | |||
Services we offer
The schedule above means that we are able to measure any roughness standard, whose total peak to valley roughness height is in the range 10 nm up to 25 µm, for any of the seven R-parameters quoted, and issue a traceable calibration certificate with statement of uncertainty for that roughness standard.
For step height (depth) measurements, we can measure any height between 100 nm and 1 mm, the measurement plan will usually include five measurements, depending on customer requirements, and issue a traceable certificate with statement of uncertainty for each measured depth.
The exact method of measurement (often referred to as the measurement protocol) which we use, is chosen to be suitable to the type of specimen and also the specific needs of the customer. Usually this will consist of twelve measurements made over the specimen’s measuring area, at evenly-spaced locations subject to the absence of serious defects, followed by software evaluation of the roughness parameters. View a sample calibration certificate
Wherever applicable, procedures and requirements set out in standards ISO 5436-1, ISO 12179 and ISO 25178-70 are followed.
Special features of our calibrations
- There is at present no optical or non-contact surface measurement technique for which traceable calibration certificates can be issued, and therefore all our surface measurements are done by the contacting stylus method. Our laboratory possesses a range of instruments and diamond styluses which are capable of measuring almost any kind of profile within the range of our accreditation schedule. For example, our finest stylus has a tip width less than 0.1 µm, which enables it to resolve accurately the finest details of a surface.
- Our certificates are able to show a diagram of the exact locations of the measurements made during calibration; this enables a customer to measure his specimen at the same locations it was calibrated at.
- Because our instruments are not automated, we are able to comply with special customer choices of measuring conditions such as traverse speed, filtering, sample spacing, etc., in cases when these are not defined by standard procedures.
- We are the only UK laboratory accredited to measure depths over 50µm.


